

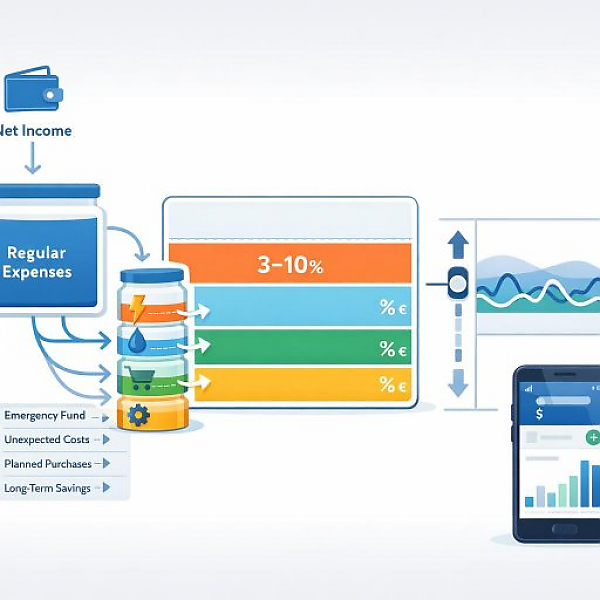
A budget buffer is a fixed amount of money in your budget tracker that is intentionally not assigned to a specific expense and is used to absorb monthly fluctuations and unexpected extra costs without blowing your planned budget.
The table below shows typical types of budget buffers, everyday examples, simple rules of thumb as a percentage of net income, and how you can record them in a digital budget tracker (e.g., in MyMicroBalance).
| Buffer type | Typical examples | Simple rule of thumb (as % of net income) | How to record it in a digital budget tracker? |
|---|---|---|---|
| General monthly buffer | Small extra costs in everyday life: • spontaneous meet-up at a café • a slightly more expensive grocery run • an unexpected bus or train ride | about 3–5 % (if your spending fluctuates a lot, closer to 5–8 %) | • Create a dedicated expense category, e.g., “General monthly buffer” • Assign a fixed amount every month in your budget plan • During the month, move expenses that “don’t really fit anywhere” into this category |
| Buffer for irregular expenses | Larger but predictable items that don’t occur every month: • annual vehicle tax • insurance premiums (semiannual or annual) • larger maintenance on a car or bike • work expenses that only come up occasionally | about 5–10 % (depending on how many irregular expenses you have) | • Create a category, e.g., “Irregular expenses – buffer” • Estimate annual costs, divide by 12, book the monthly amount as a “buffer expense” • When the actual payment occurs, record it in this category |
| Safety margin for variable expenses | Areas that fluctuate heavily: • electricity, heating, water • groceries and drugstore items • gas or other transportation costs | about 5 % for all variable expenses combined (if energy or fuel prices are very volatile, possibly 5–10 %) | • Plan a small additional buffer in the budget for each area, e.g., “Energy – buffer” • Monthly budget for the category = average costs + buffer amount • Keep it clearly separated in your budget tracker: base amount vs. buffer amount |
| Buffer for infrequent repairs & replacements | Unexpected but unavoidable expenses: • a broken household appliance • smartphone repair • small apartment repairs (e.g., faucet, light) • replacement of wear items (e.g., bike tires, work shoes) | about 3–5 % (plan higher if you have older devices or an older car) | • Create a category, e.g., “Repairs & replacements – buffer” • Book a fixed amount each month as an expense into this category • If something breaks, pay/record the actual expense using this category |
Below is a simple process you can use in a digital budget tracker like MyMicroBalance. Adapt the steps to your own situation.
Before setting a buffer amount, you need an overview of your finances.
Goal of this step: You’ll see how much financial breathing room you actually have each month and where a buffer is especially useful.
You don’t have to use all buffer types at once. To get started, one or two buffers are usually enough.
It’s important to clearly separate buffer categories from normal spending categories. That way, later you can see exactly how much you’re using the buffer.
Now decide how large your buffer should be per month. Use the rules of thumb from the table as a rough guideline.
Important: A buffer is not “fun money.” It’s part of your plan. Treat it like a fixed expense so you don’t accidentally overcommit.
At the end of the month, determine whether your buffer amounts were well chosen. A short checklist helps.
Based on these questions, decide whether to increase, decrease, or adjust the structure of your buffer types for the next month. The goal isn’t to find the perfect amount right away, but to gradually tailor your buffer to your real life situation.
With clearly planned budget buffers, you gain security and keep control of your household money—even when everyday life ends up costing more than planned.


 1
1 2
2 3
3 4
4

